Gel printing plates have become a beloved tool for artists and crafters alike, offering endless possibilities for creative expression. Whether you're a seasoned printmaker or a curious beginner, these versatile plates can breathe new life into your artistic adventure. In this post, we'll explore five exciting ways to use gel printing plates, from printing botanicals to experimenting with Posca pens and stencils.
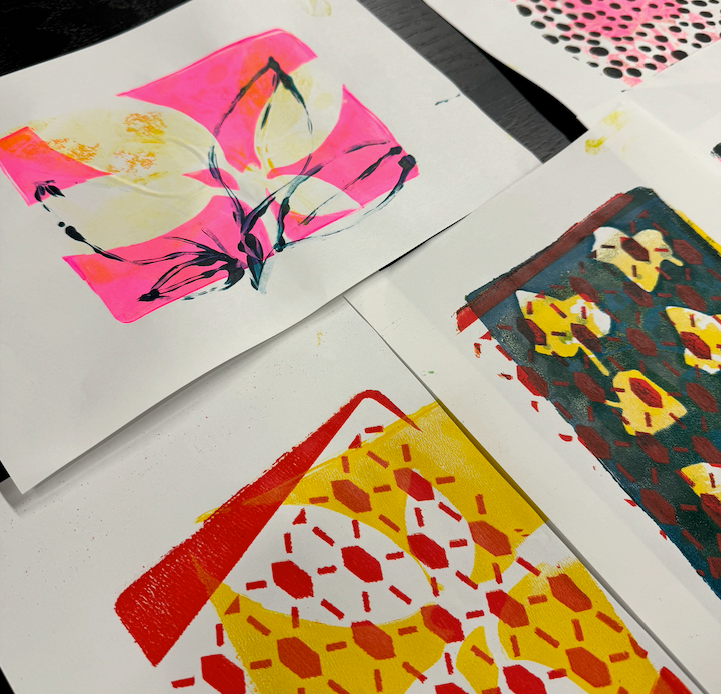
1. Printing Botanicals
One of the most captivating uses of gel printing plates is to create stunning botanical prints. Begin by selecting a variety of leaves, flowers, or other natural elements with interesting textures. Lay them carefully onto the gel plate, ensuring they adhere securely. Then, apply a thin layer of paint over the surface of the plate, making sure to cover the botanicals completely. Gently place a piece of paper over the paint-covered plate and press down evenly. Peel back the paper to reveal a beautiful print adorned with intricate botanical details.
 |
2. Masking with Paper Masking techniques can add depth and complexity to your prints, and gel printing plates offer an ideal surface for experimenting with this method. Start by tearing or cutting shapes out of paper to create stencils or masks. Arrange these paper elements on the gel plate in your desired pattern or design. Next, apply paint over the entire surface of the plate, covering both the paper masks and the exposed areas. Carefully remove the paper to reveal the intricate layers beneath, resulting in a visually striking print with dynamic depth and dimension. |
 |
3. Image Transfer Gel printing plates provide an excellent medium for transferring images onto paper, creating unique collages and mixed media artworks. Begin by selecting an image printed on regular printer paper—black-and-white images tend to transfer best. Place the image face down onto the gel plate and gently rub the back of the paper to ensure good contact with the surface. Moisten the back of the paper with a damp sponge or cloth, then carefully peel it away to reveal the transferred image on the gel plate. Press a piece of paper onto the plate to lift the image and create a one-of-a-kind print. |
4. Posca Pens
Posca pens, known for their vibrant colors and opaque coverage, can be used in conjunction with gel printing plates to add intricate details and embellishments to your prints. After creating a base layer using paint and other materials, use Posca pens to draw fine lines, intricate patterns, or bold accents directly onto the gel plate. Experiment with different colors and line weights to achieve the desired effect. Once your design is complete, press a piece of paper onto the plate to transfer the ink and create a visually striking print with added depth and texture.
5. Stencils:
Stencils are a versatile tool for creating intricate designs and patterns with ease, and gel printing plates offer the perfect surface for incorporating them into your prints. Begin by selecting a stencil that complements your artistic vision—whether it's geometric shapes, floral motifs, or abstract patterns. Place the stencil onto the gel plate and apply paint over the entire surface, making sure to cover the stencil openings completely. Carefully remove the stencil to reveal the intricate design beneath. Press a piece of paper onto the plate to transfer the design and create a beautifully detailed print with crisp, clean lines.

Gel printing plates are a treasure trove of creative possibilities, offering endless opportunities for experimentation and artistic exploration. Whether you're drawn to botanical prints, intrigued by masking techniques, or eager to experiment with image transfers and Posca pens, there's no limit to what you can achieve with these versatile tools. So grab your gel printing plate and unleash your creativity—your next masterpiece awaits!